Domain Setup · Yogi's VPS
How to connect your domain and update DNS records
Your domain is the entry point to your website. DNS tells browsers which server to reach when someone types your URL. This guide walks you through the safest ways to connect your domain to Yogi's VPS and update DNS records.
Every registrar has a slightly different screen, but the steps are always the same. You choose how you want to connect, update a few records, then verify that your site loads over HTTPS on the new server.
If your site is already built and ready to move, this step usually comes after migrating from another host or launching your first WordPress site.
What you need before you start
You can connect your domain in a single session if you gather a few key details in advance.
Logins and account access
- Login details for your domain registrar.
- Access to any external DNS provider if it is separate from your registrar.
- Access to your email provider if you use custom email.
Information from Yogi's VPS
- Your server IP address and recommended DNS values from your onboarding email.
- Nameservers to use if you want to move DNS entirely to Yogi's VPS.
- Confirmation about which domain is primary, with www or without.
If your domain also handles email, be careful not to disturb mail records during the process. Review creating and managing email accounts before making changes.
Step 1: Choose how you want to connect your domain
There are two main ways to connect your domain to Yogi's VPS. The right option depends on whether you want us to manage all DNS or keep your current DNS provider in place.
Option 1: Point nameservers to Yogi's VPS
You change your domain's nameservers to the ones we provide. After that, DNS records live on our side.
- Simpler long term if we are your main technical partner.
- Fast to update records for subdomains, staging sites, and new services.
- Works best if you do not rely on complex existing DNS setups.
Option 2: Keep current DNS and update records only
You leave nameservers where they are and only change a few key records so that the domain points to our server.
- Good if you already use Cloudflare or another managed DNS provider.
- Lets you keep existing records for email and other services untouched.
- Gives your internal team or IT vendor more direct control over DNS.
For a narrower walkthrough focused specifically on go-live pointing, also see pointing your domain to Yogi's VPS.
Step 2: Update nameservers (Option 1)
Use this path if you decided to point nameservers to Yogi's VPS. After you change nameservers, allow some time for DNS to propagate around the world.
Checklist: Change nameservers at your registrar
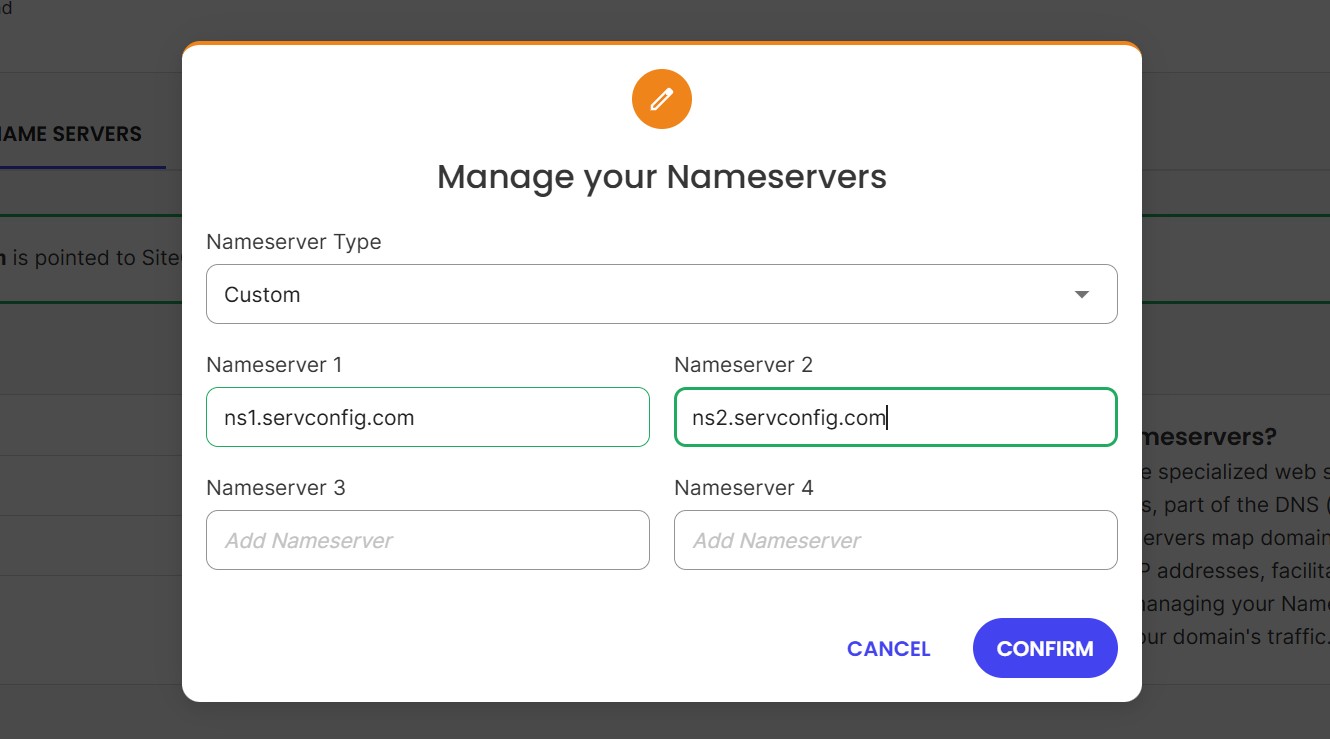
- Log in to your registrar and locate the Nameservers or DNS section.
- Switch from default nameservers to custom nameservers.
- Enter the nameserver values provided in your Yogi's VPS onboarding email.
- Save changes and confirm there are no validation errors.
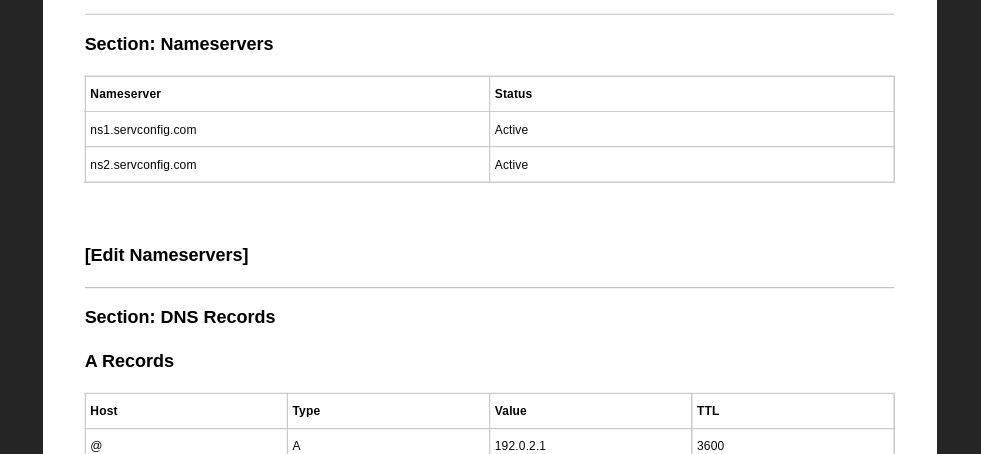
Step 2: Update A and CNAME records (Option 2)
Use this path if you want to keep DNS where it is and only point your website traffic to Yogi's VPS.
Checklist: Update key DNS records
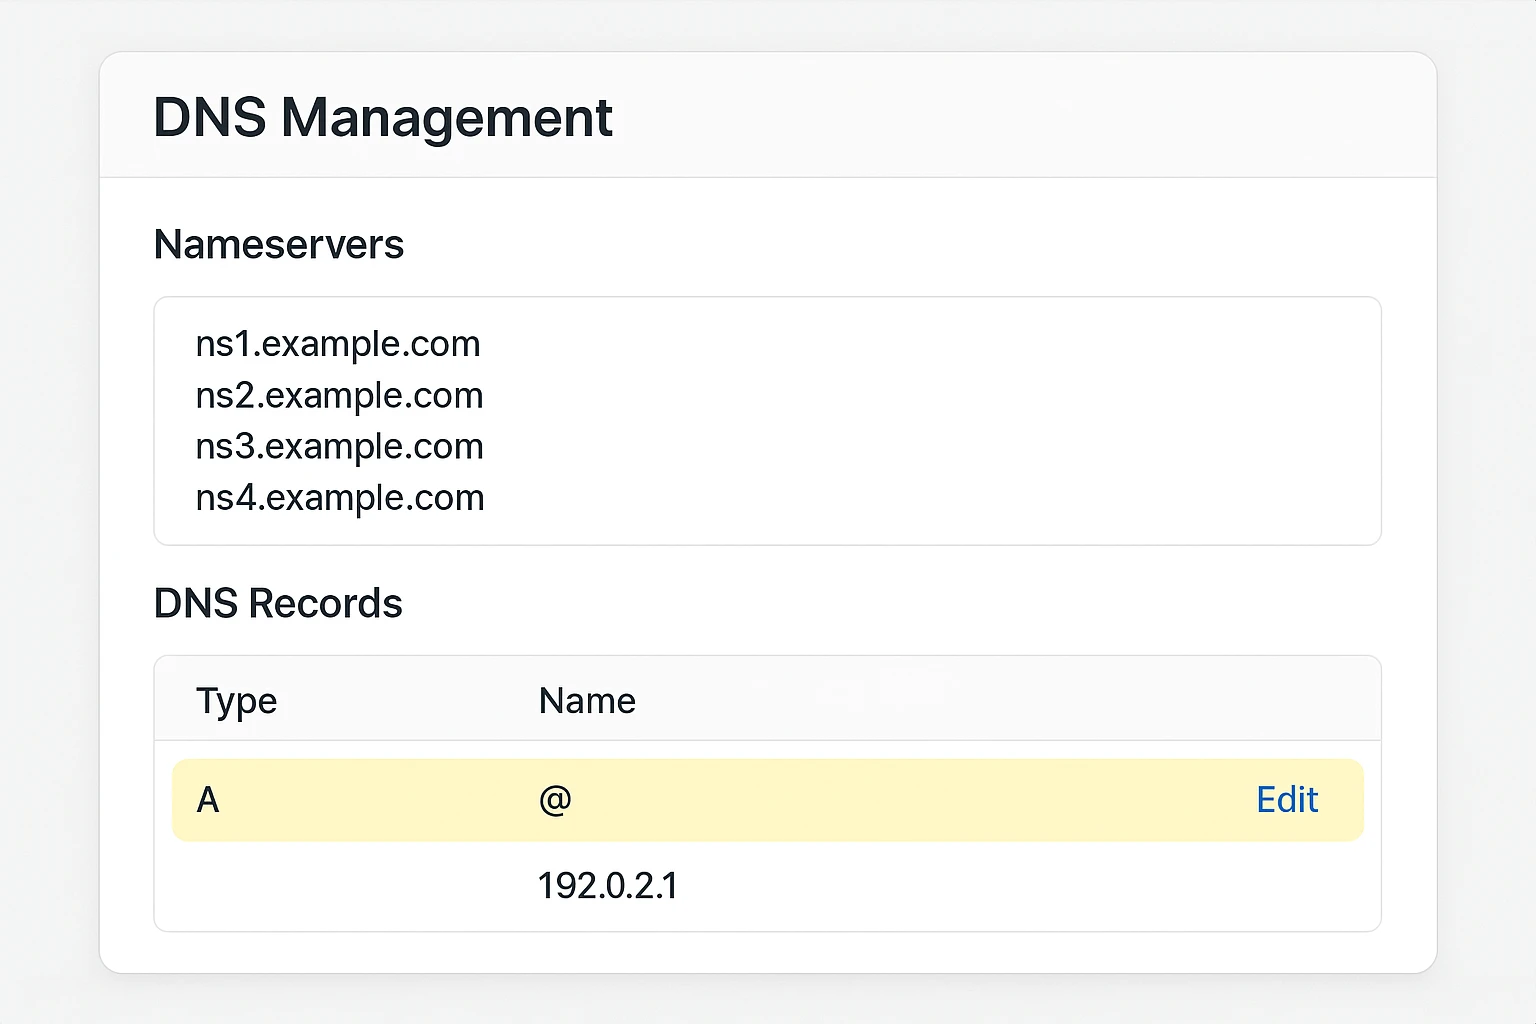
- Locate your DNS zone editor or DNS management area for the domain.
- Find the A record for the root domain.
- Edit that A record to use your Yogi's VPS server IP address.
- Find the record that handles www and confirm it still points correctly.
If your DNS setup includes many records, do not remove items you do not recognize. Focus only on the records that affect the website.

Keep MX, SPF, DKIM, and related email records unchanged unless you are intentionally moving mail services.
Step 3: Verify DNS and HTTPS are working
After you update nameservers or records, you want to confirm that your domain is resolving to the new server and that HTTPS is in place.
Checklist: Confirm DNS and SSL
- Visit your domain in a private browser window and refresh a few times.
- Check that the site looks like the version on Yogi's VPS.
- Confirm you see the padlock icon and that the URL starts with https.
- Ask us to confirm that an SSL certificate is installed and auto renewing.

If SSL is not active yet, follow setting up free SSL for your site.
Common DNS problems and quick fixes
If something does not look right after a DNS change, it is usually one of a few common issues.
Site shows old host or random errors
- DNS may still be propagating.
- Browser cache may be serving an old copy.
- Confirm the A record truly points to the Yogi's VPS IP address.
Email stops working after changes
- MX records might have been changed or removed.
- Compare current MX records with your provider's official values.
- Restore the correct MX values and give it time to settle.
Browser warning about insecure site
- SSL may not be installed yet.
- Ask us to confirm HTTPS is enabled and redirects are in place.
- Make sure you access the site at https, not http, when testing.
If the site is live but still feels slow after DNS settles, review improving Core Web Vitals or troubleshooting a slow WordPress dashboard.