Email & Communication · Yogi's VPS
Creating and managing email accounts
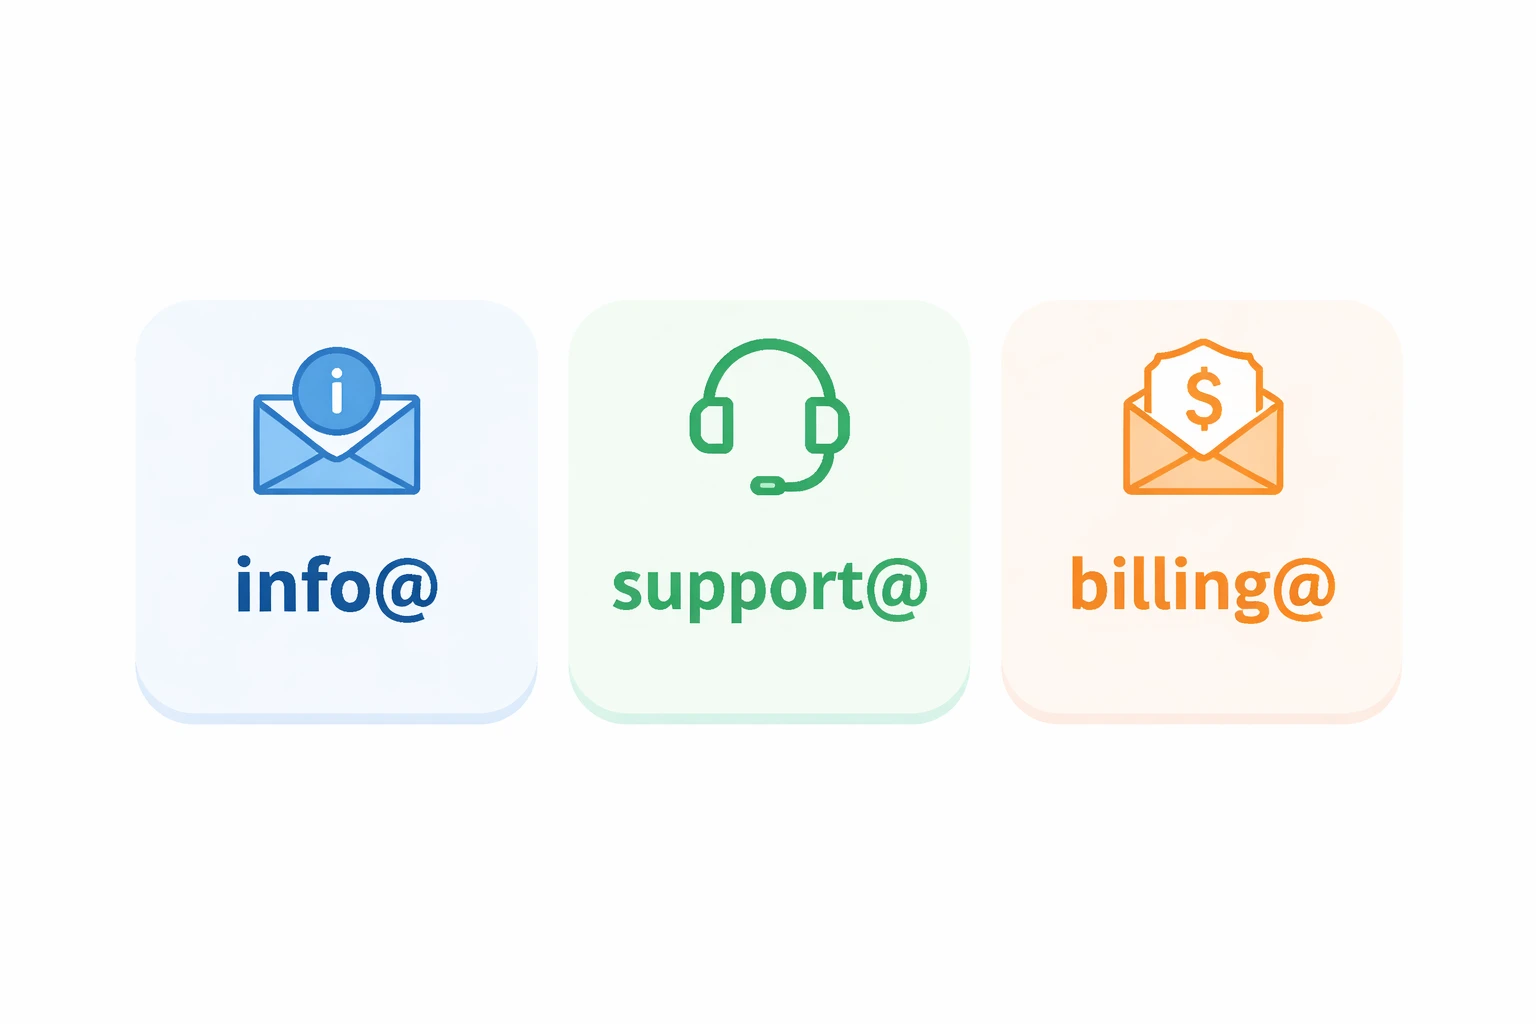
With Yogi's VPS you can create professional email addresses like info@yourdomain.com and support@yourdomain.com.
This guide walks through how to create new accounts, change passwords, manage storage, and access mail from different devices.
Before setting up email, make sure your domain is connected properly. If you have not done that yet, see how to connect your domain and update DNS records.
Before you create email accounts
There are a few things to verify before you start creating inboxes on your domain.
Check your domain and DNS
- Your domain is registered and active.
- DNS is set up correctly and pointing to Yogi's VPS or your DNS provider.
- You understand where your current email is hosted.
If your domain is not set up yet, review: pointing your domain to Yogi’s VPS.
Plan your email structure
- Decide on addresses like info@, support@, billing@
- Choose full inbox vs forwarding
- Assign responsibility for each mailbox
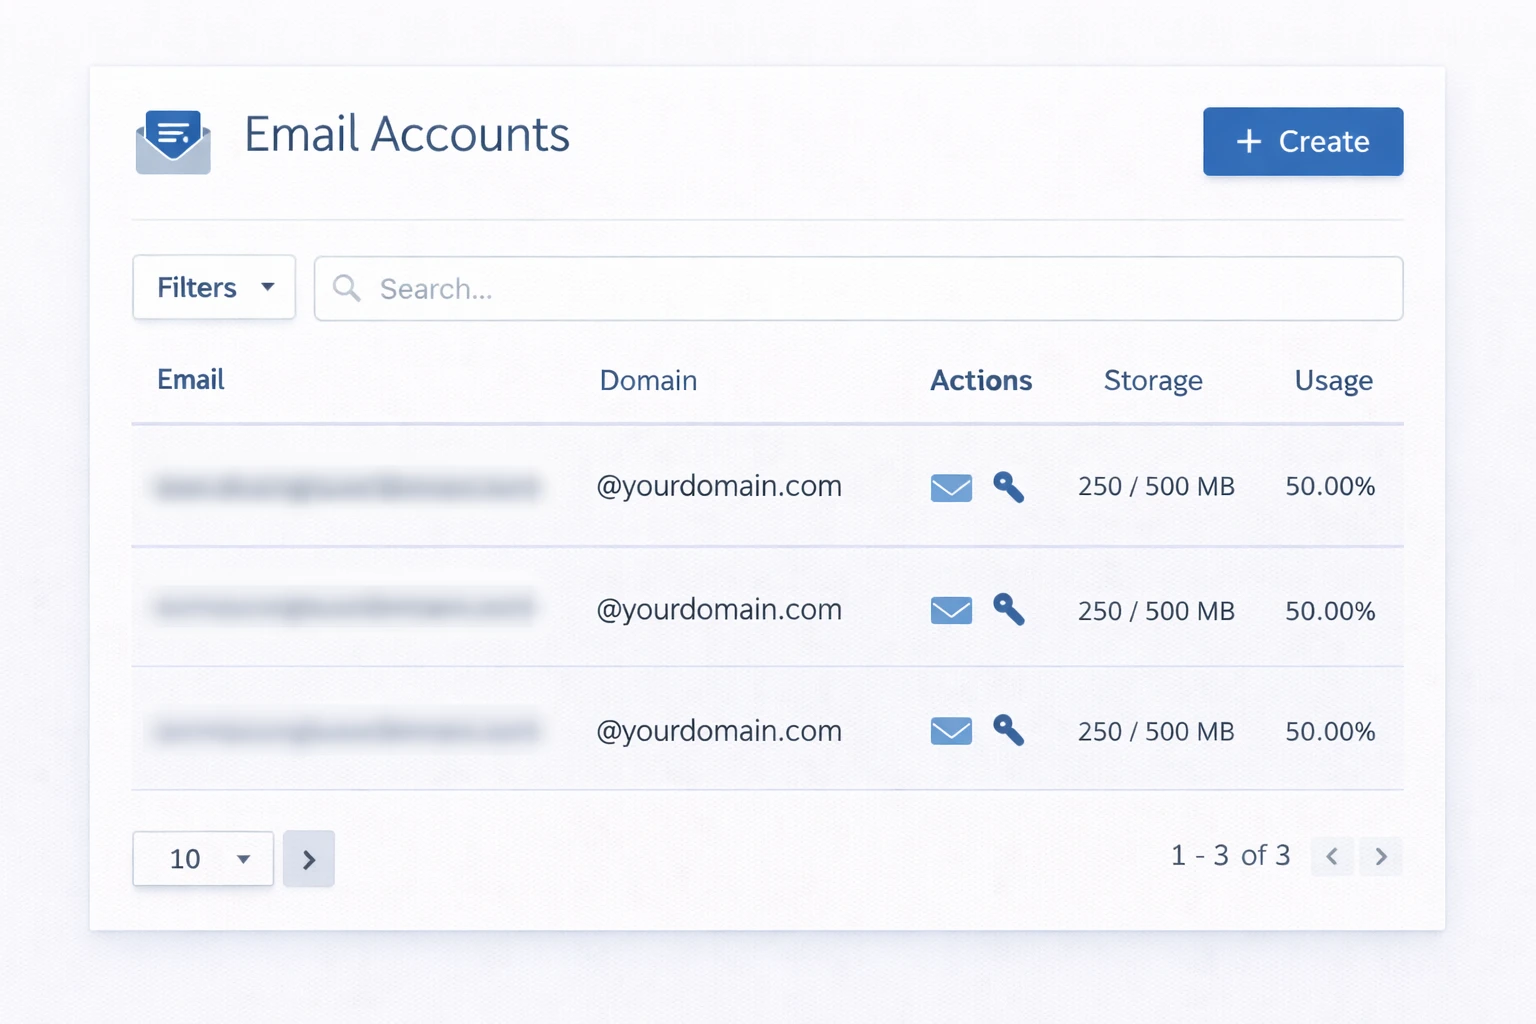
Step 1: Create a new email account
You will create accounts inside your hosting control panel.
- Log in to your hosting dashboard
- Go to Email → Email Accounts
- Click Create or Add New
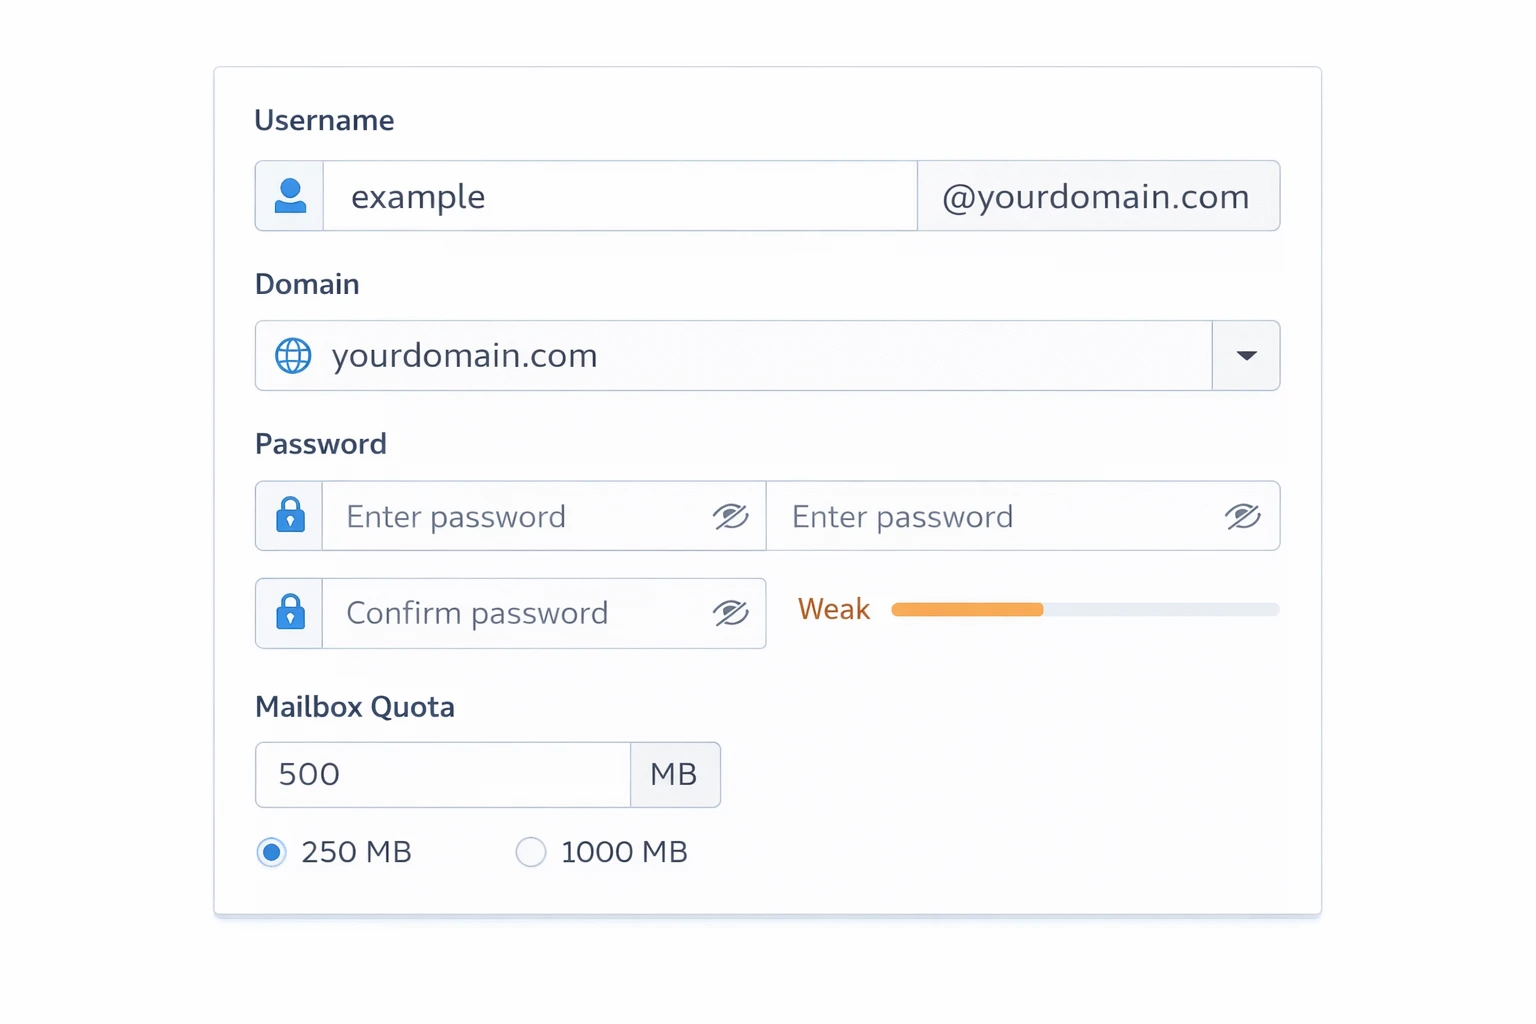
- Enter email name (info, support, etc.)
- Select domain
- Set a strong password
- Set storage limit
- Save
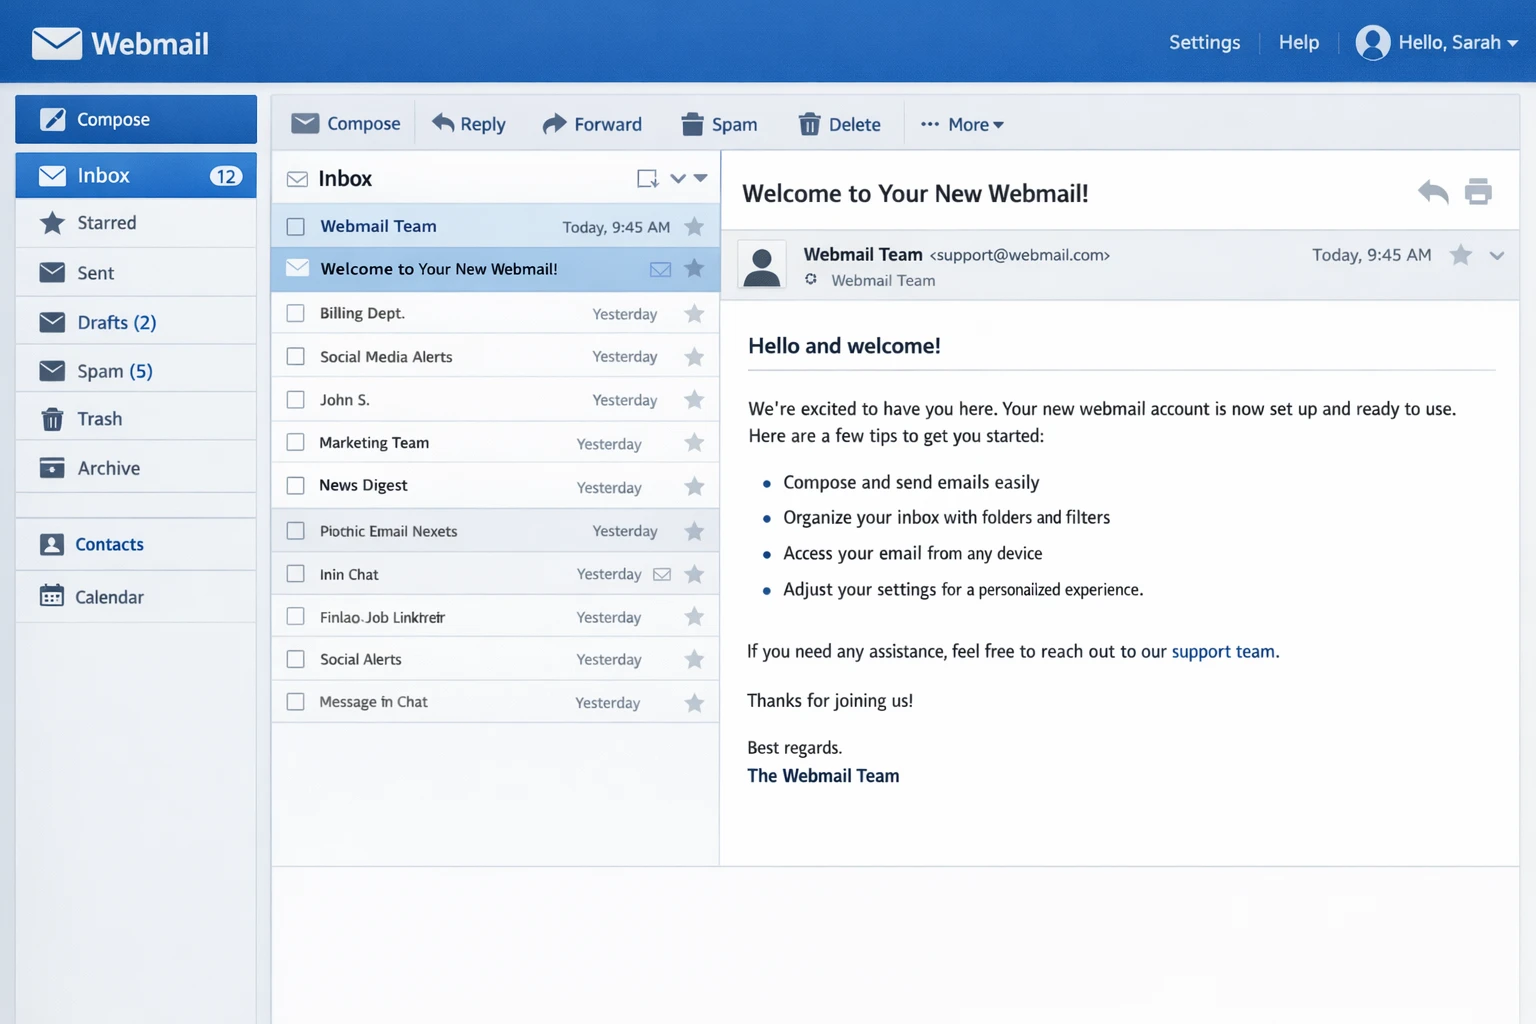
Step 2: Access your email
Webmail
- Use the webmail login
- Enter full email + password
- Choose interface
- Send a test email
Email apps
- Add account in Outlook, Gmail, Apple Mail
- Use manual setup if needed
- Enter server settings
Forwarders and shared inbox setup
Not every email needs a full inbox.
Use forwarders when
- Multiple emails go to one inbox
- You want simple routing
- You need temporary addresses
Setup
- Go to Email → Forwarders
- Create new forwarder
- Enter source and destination
- Test
Managing passwords and storage
Change password
- Go to Email Accounts
- Select account
- Change password
- Update connected devices
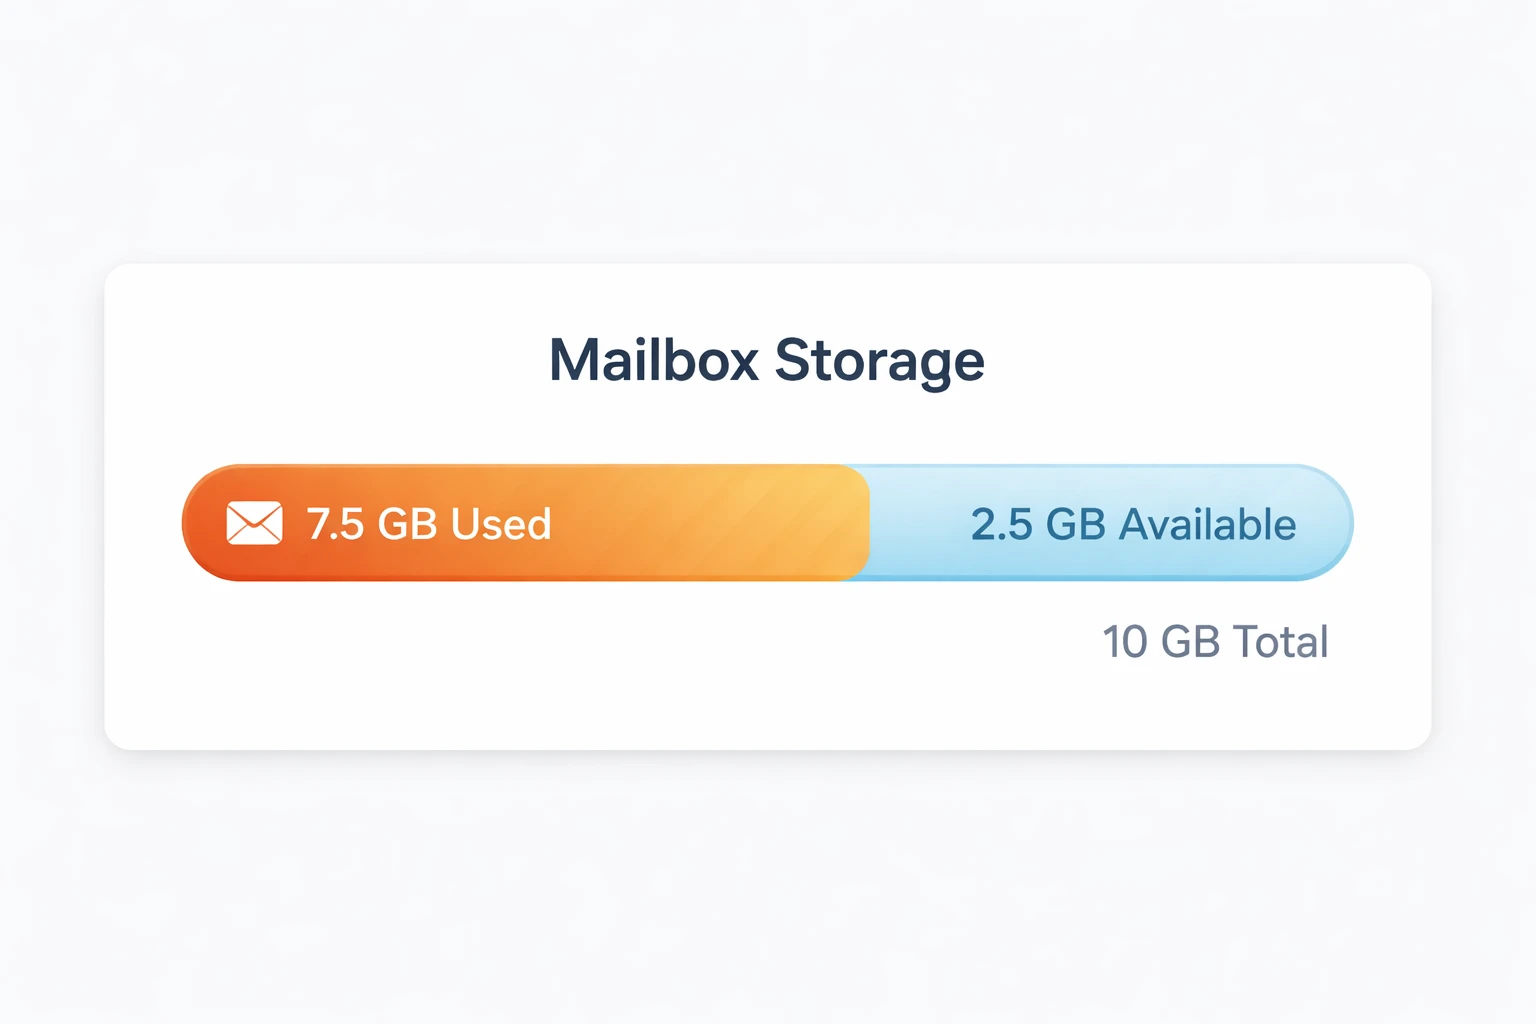
Manage storage
- Delete large attachments
- Use folders and filters
- Request more storage if needed
Improve email deliverability
- Configure SPF, DKIM, and DNS records
- Avoid sending bulk email from inboxes
- Keep passwords secure
Deliverability depends heavily on DNS and domain setup. If needed, revisit: DNS configuration guide.
Email and your overall setup
Email is just one part of your site infrastructure. A properly configured domain, secure login, and optimized hosting all work together.
If you are just getting started, we recommend reviewing: